Tuesday, October 18, 2011

Plate Walls

I really like the look of eclectic walls of plates.


The free-form shape of this one is so pretty.


Isn't it cool how this one wraps around the wall?

If you want to see more plate walls, just search around on Pinterest.

This weekend, I was in Anthropologie and found so many great plates.  Here are a few of my favorites, all of which can be found at Anthro.


 Such a fun quote - reminds me of spending time with my sister or friends I have known forever.


I think most of my walls are taken.  I just might have to move things around for a plate wall.  I also like the idea of slowly collecting plates over time and including some plates that have meaning or sentimental value.

What do you think?  Do you like the look of a plate wall?  Do you have one?

Monday, October 17, 2011

The Painted Piano

Ever since I started blogging, I think I've been talking about painting my piano.  Well, I finally bit the bullet and did it!

Here's the before:
The piano was a freebie, given to us my some friends who no longer wanted it.  It was a very dark wood and not in good shape.

Here's the after:

Much brighter and happier.  Did you notice that I'm missing a few pics from my gallery wall?  Those would be the ones that fell on the floor and shattered.  Must reframe and rehang.

I think I put off this project for so long because I thought it was going to be really difficult.  Quite the contrary.  The piano was easy to paint because it basically has straight, square lines without a lot of nooks and crannies.

The hardest part was painting around the keys.  Here's what I did:
I simply taped around the keys, shoving the tape down into the crack between the wood and keys.  This worked really well.  It might have been luck, but I didn't get any paint on the keys.

Look what I found on the inside lid of the piano.

The wood was originally so pretty and had a beautiful trademark.  I didn't even know this was inside of the piano.  Here's a close-up:

And another "after" shot:

A couple of details:
  • I started with sanding the piano down and taping off the pedals and keys.
  • I used Behr Ultra Premium Paint Plus Primer in Martha Stewart's Sultana.  I thought I would be able to skip a step in using the paint and primer in one, but I still ended up having to paint 3 coats.  I used a semi-gloss finish.
A couple of concerns/questions:
  • I was hoping the paint color would be a little more olive - maybe a little darker, but I don't really feel like repainting it.
  • Should I try going over it with a coat of stain or a dark glaze to make it darker?
Overall, I'm happy with the fresh, bright look it gives this wall of our home.  What do you think?

I'm linking this piece to some of these great blogs:
Today's Creative Blog, Sugar Bee Crafts, Not Just a Housewife, Reasons to Skip the Housework, Bella Before and After, Primitive and Proper, Home Stories of A to Z, Savvy Southern Style, DIY by Design, Tip Junkie, Type A Decorating, http://sistersstuff.blogspot.com/, The Thrifty Home, Domestically Speaking, Primp,
A Diamond in the Stuff, Restore Interiors, The Shabby Chic Cottage, Somewhat Simple, Beyond the Picket Fence, Fireflies and Jellybeans,My Simple Home Life,
Addicted 2 Decorating, Just a Girl, Remodelaholic, Miss Mustard Seed, Finding Fabulous, Tatertots and Jello, Under the Table and Dreaming, Thrifty Decor Chick, Coastal Charm, Junker Newbie, Serenity Now

Friday, October 14, 2011

Happy Friday!

Hooray! It's Friday and I'm guest posting at one of my all time favorite blogs, Primitive and Proper. Hop on over and visit me there.

Wednesday, October 12, 2011

Suzy's House Party #13 - Link Up!

Hello partiers!  Pantone recently announced its hot colors for spring 2012.  Here they are:

Do you have any favorites?  I think sweet lilac and driftwood would be pretty together.

In case you don't remember, Honesuckle was the 2011 color of the year.

I wonder how they come up with these things?  But, I think it would be a fun job to analyze different color trends.

On to the features from last weeks party!

How gorgeous is this hutch by Vintage Shabby Chics? 


Here's a dresser from Frou Fru-Gal that combines two trends, ombre plus stenciled numbers, to make one cute dresser.


Saved by Suzy
<div align="center"><a href="http://savedbysuzy.blogspot.com" title="Saved by Suzy"><img src="http://i1218.photobucket.com/albums/dd408/lizzygal18/Savedbysuzypartyblogbuttonchevron-1.png" alt="Saved by Suzy" style="border:none;" /></a></div>

•Link up your home decor project. Pretty much anything to do with you house is fine.

•Please provide a link back to my blog. A text link is fine, or feel free to grab my "Saved by Suzy" party button from the sidebar. The more people that know about the party and participate the better for all of us.

•Be sure to share the love and leave comments for others.

•That's it.


What do I do with this?

Sometimes Big K gets a little over-zealous with his garage sale hunting.  Some neighbors were having a garage sale and he came home with this old sewing machine.

 It's in a really pretty cabinet that is in perfect condition.


It came with the original manual and all kinds of cool little accessories.  However owned this machine took great care of it.

He paid $75 for it and was so excited by his amazing find.  I was a little shocked because that is much more than I like to spend on my typical Saved by Suzy pieces.

So, here's my question...what do I do with this sewing machine?  Should I try to sell it as-is on Craigslist?  I wonder how much it is worth.  I tried to do a little research, but couldn't come up with any pricing.  I don't think I should paint it because the wood is in such great condition.  What do you think?  It's not something I would keep.  I already have a nice, modern sewing machine that I barely know how to use.  I also really don't have a place for this.

Linking to: Junker Newbie's Would You Buy It Wednesday?

Tuesday, October 11, 2011

A Little History Plus a Makeover

Many of you may know that my husband and I got married at the Hotel Jerome in Aspen.

The Hotel Jerome was built in the 1880's when Aspen was at the apex of the silver boom.  The hotel was the height of luxury for the time.  It featured the first electric lights west of the Mississippi River among other luxuries of the time.

Since the hotel has had a long life, it needs constant updating and repair.  So, the hotel holds a garage sale every few years to get rid of its unwanted antiques and to make room for new antiques.

I only was around for one of these legendary garage sales and I knew nothing about restoring furniture.  All I wanted was the latest and greatest from Pottery Barn or Crate and Barrel.  My husband picked up an amazing, huge desk.  Picture carved spiraling columns, gargoyle heads, etc.  Hubs was in love with it.  I thought it was a monstrosity.  So, I made him sell it.

We also picked up a really pretty end table with a gorgeous marble top.  Soon after, I was sick of it and sold it.  I'm kicking myself for getting rid of these beauties!

The only things we have left from the hotel are the two chairs flanking the console table:

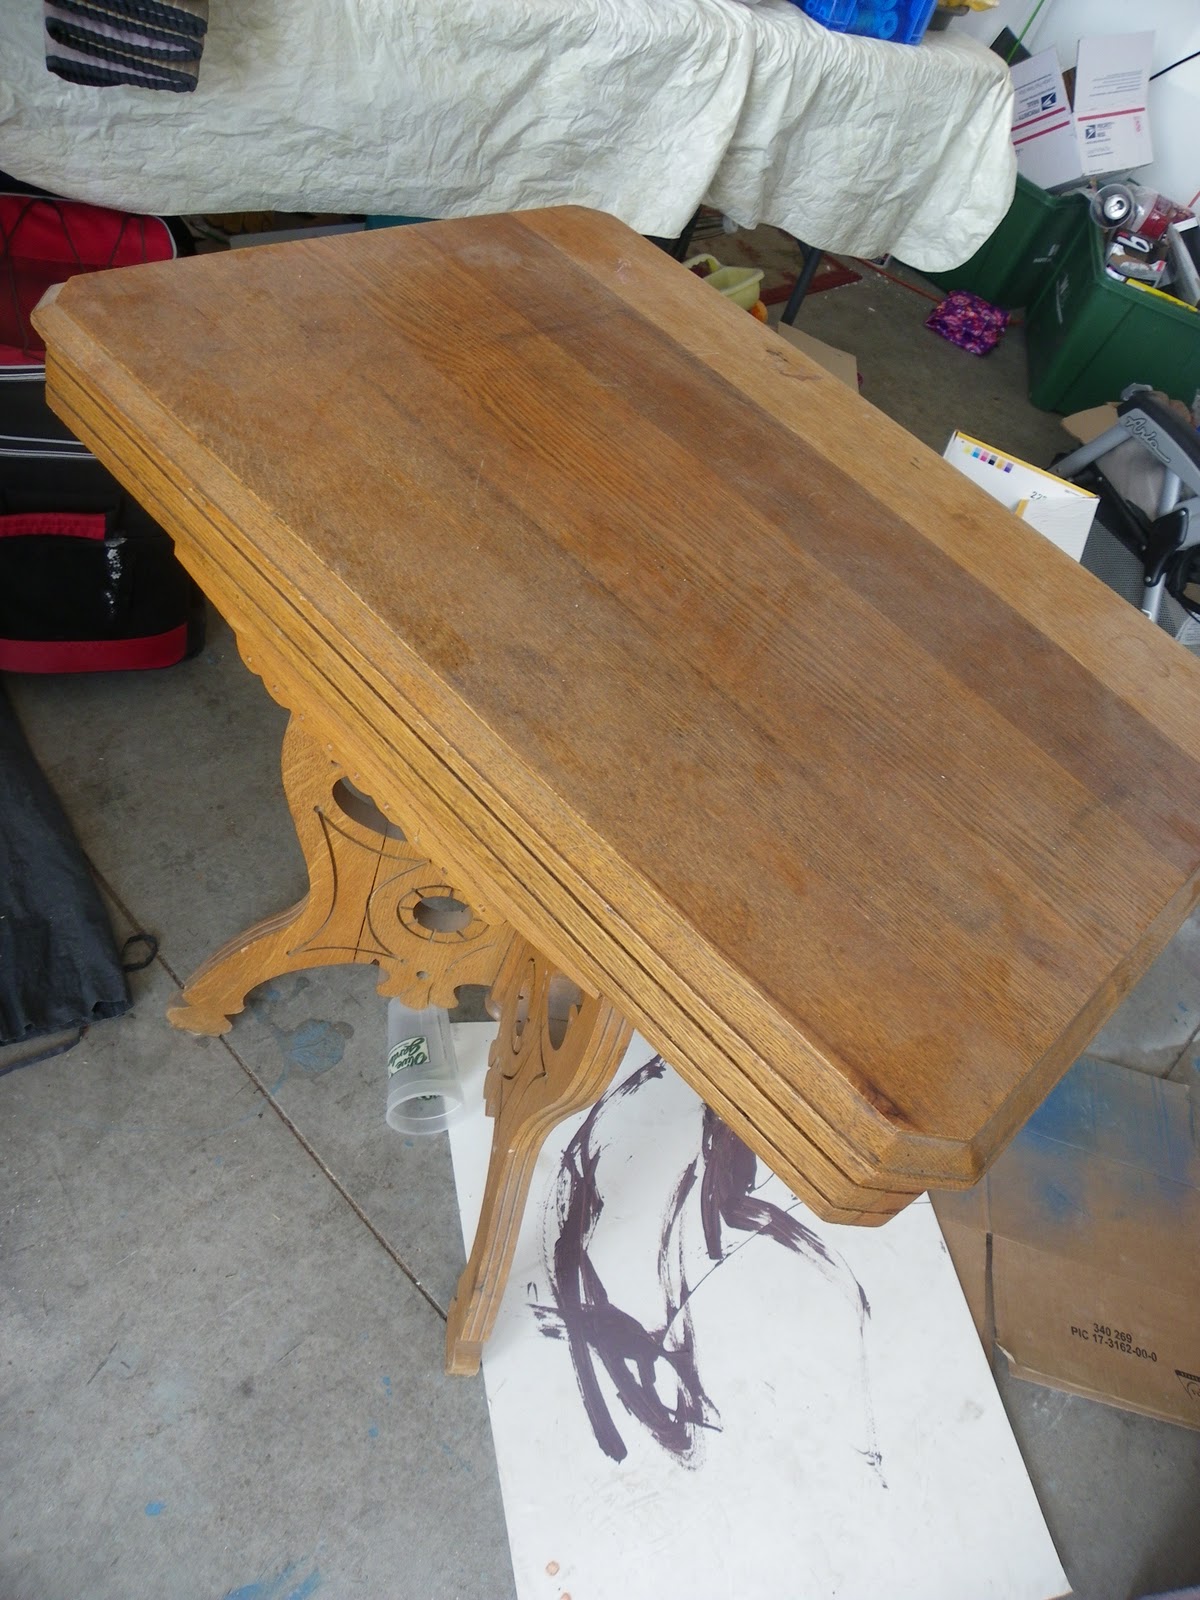
And this little table.  This table has sentimental value because I think it was the first piece of furniture my husband and I bought together.

This table has been languishing in the garage.  (By the way, we've cleaned the garage since these pictures were taken.  It's so much more organized and I can actually park my car in there.  Hooray!)

I stripped and stained the top and painted the bottom with a light aqua paint. 

 I think the carved detail all around the bottom is so  unique and interesting.  Too bad I decided to show you the cracked side.  Note to self: turn table around so crack faces back!


 I'm in the process of painting all of the carving gold, but it's taking FOREVER!


 I like this little spiderweb basket of gourds, but I noticed tonight that some of the gourds are starting to get moldy.  This has never happened to me before.
 Not too shabby for a 100+ year old!
Phew!  You stuck around through a major picture overload.  Thank you!


I'm linking this piece to some of these great blogs:
Today's Creative Blog, Sugar Bee Crafts, Not Just a Housewife, Reasons to Skip the Housework, Bella Before and After, Primitive and Proper, Home Stories of A to Z, Savvy Southern Style, DIY by Design, Tip Junkie, Type A Decorating, http://sistersstuff.blogspot.com/, The Thrifty Home, Domestically Speaking, Primp,
A Diamond in the Stuff, Restore Interiors, The Shabby Chic Cottage, Somewhat Simple, Beyond the Picket Fence, Fireflies and Jellybeans,My Simple Home Life,
Addicted 2 Decorating, Just a Girl, Remodelaholic, Miss Mustard Seed, Finding Fabulous, Tatertots and Jello, Under the Table and Dreaming, Thrifty Decor Chick, Coastal Charm, Junker Newbie

Monday, October 10, 2011

She's Crafty

Actually I'm not crafty at all and really don't enjoy crafts.  I am too impatient and thus, my results are never as great as I expect.

But, for some reason fall makes me feel like jumping into the crafty world.  If I can make it with a glue gun, I'll attempt it!

I just had to share this cutie-pie at the pumpkin patch.

The weather was chilly here this weekend.  It was the perfect time to warm myself by the glow of my glue gun as I decided to make a yarn wreath.  I might be the last person in the world to make one of these, but they are so cute, that late is better than never.


Here's what I started with, a straw wreath and some yarn:

Next, start wrapping your yarn around the wreath form (leave the plastic on).  There's really no trick to this.  I would wrap the yarn around about ten times and then shove the yarn all together so none of the wreath from was showing.

Looks like hand modeling is not in my future!  That finger looks creepy.

Stick with the wrapping.  I won't lie....it takes a LONG time.  I used the entire roll (skein?) of gray yarn.

To get the white "X" effect, I took the yarn and wrapped it one way around and pinned it in place.  Then, I wrapped it the opposite way to cross the X's.

Next, comes the fun part.  Decide how you want to decorate the wreath.  I made felt flowers by following this tutorial.

I added a bat and a little "Boo" banner and it's done.


The bat's eyes are just pins.


I used pins to attach everything to the wreath.  Now, I can change out the embellishments for different seasons without having to re-wrap and entire wreath in yarn.  Next up, white, green and red flowers for Christmas.

I'm linking this piece to some of these great blogs:
Today's Creative Blog, Sugar Bee Crafts, Not Just a Housewife, Reasons to Skip the Housework, Bella Before and After, Primitive and Proper, Home Stories of A to Z, Savvy Southern Style, DIY by Design, Tip Junkie, Type A Decorating, http://sistersstuff.blogspot.com/, The Thrifty Home, Domestically Speaking, Primp,
A Diamond in the Stuff, Restore Interiors, The Shabby Chic Cottage, Somewhat Simple, Beyond the Picket Fence, Fireflies and Jellybeans,My Simple Home Life,
Addicted 2 Decorating, Just a Girl, Remodelaholic, Miss Mustard Seed, Finding Fabulous, Tatertots and Jello, Under the Table and Dreaming, Thrifty Decor Chick, Coastal Charm, Junker Newbie, Serenity Now