Showing posts with label stripping furniture. Show all posts

Tuesday, December 27, 2011

Top Posts of 2011 and Link Party Announcement


As you know, I hold a link party every Thursday.  People usually link up projects they have been working on.  However, I doubt many of us have been creating anything new this week.  If you have, kudos to you!  So for this week's party, I would like it to be a holiday open house where we are able to meet some new bloggers.  Link up your favorite post from the year; write a new post introducing yourself; share your most popular post; etc.  Feel free to link something that best represents you and your blog.    It doesn't have to be a project! But, if you have a new project, feel free to link that too.  I'm looking forward to this party on Thursday.

I like this time of year.  The Christmas madness has passed and now I'm able to relax and reflect on the past year.  I'm also enjoying spending time at home with my family and not having to be anywhere or do anything that we don't want to do.  Such a nice change from the normally frantic pace of life.

I wanted to share my three most popular posts from the past year with you.

#3:  Coffee Table Makeover
This was my personal favorite as well.  This table is still in my family room and it just gets better with age and the more beaten-up it gets.  Love it.

#2 Buffet Makeover
This $10 buffet makeover was one of my first projects.  I like the gold greek key detail, which was my husband's idea.

This post was the most popular by a landslide.  Unfortunately, I don't think the content is what attracted viewers.  The post was titled "How to Strip," and I think this might have caught the eye of some "unseemly sorts."  Readers might have been looking for a different sort of tutorial...one not involving wood and various chemicals!

I hope many of you are enjoying some relaxation and quiet time this week!  Remember to stop by on Thursday to join the link party and to get to know some new bloggers!

Linked here:
Home Stories of A to Z

Tuesday, July 5, 2011

Coffee Table

Yesterday I shared my little Saved by Suzy-style stripping tutorial. As you know, I was stripping the top of a coffee table that I primed (oops!) and then decided that I wanted to stain.

Here's what I started out with:
Such a pretty shape, don't you think?

Next, I removed some ugly brass hardware and filled in the holes with wood filler.

Sanding and priming were up next. And then she sat in my garage for a LONG LONG time until I decided what to do. Finally I stripped the top and found some beautiful wood underneath.

I had some blue "oops" paint on hand that I used on the legs, stained the top with Minwax Chestnut, distressed the legs, added a coat of stain to the legs, and finally waxed the top.

Here she is after the big makeover:

I was inspired by this table from Home Decorator's Collection that retails for $209:

Linked:
Today's Creative Blog
Sugar Bee Crafts
Not Just a Housewife
Reasons to Skip the Housework
Bella Before and After
Primitive and Proper
Home Stories of A to Z
Savvy Southern Style
DIY by Design
Tip Junkie
Type A Decorating
http://sistersstuff.blogspot.com/
The Thrifty Home
Domestically Speaking
Primp
A Diamond in the Stuff
Restore Interiors
The Shabby Chic Cottage
Somewhat Simple
Beyond the Picket Fence
Fireflies and Jellybeans
My Simple Home Life
Addicted 2 Decorating
Just a Girl
Remodelaholic
Miss Mustard Seed
Finding Fabulous
Tatertots and Jello
Under the Table and Dreaming
Thrifty Decor Chick
Coastal Charm

How to Strip

A piece of furniture, that is. Just think of the number of "stripping" comments that can be made along with this post. I think my husband tried to make just about all of them!

Anyways, I have never stripped a piece of furniture before. I usually just grab some primer and paint and call it good. I have had this coffee table sitting in my garage for a while now:

It started out like this:

But, then I decided to prime it and get it ready for paint. I didn't really have an inspiration, so I just let it sit and sit and sit and sit.

I have been loving all of the pieces I've seen lately with a stained top and painted body, so I decided to try that. That meant I would have to remove the primer I had so lovingly already applied. UGH!!

I had no idea how to strip a piece of furniture, so I headed to the hardware store to browse the aisles. Here's what I came home with:
Stripper
Paint Thinner a.k.a. Mineral Spirits
Paint Brush
Mixing Cup
Diet Dr. Pepper - do NOT skip this ingredient

I started by applying a thick layer of the stripper. The consistency is similar to hair gel. I dumped it on top of the table and then spread it around with the flat part of the paint brush. According to the directions, you are not supposed to brush the stripper on, just spread it. When applying the stripper, more is more. The thicker the better. Almost immediately, the primer started to bubble, like this:

When working with stripper, be sure to wear gloves. I couldn't find any gloves, but luckily I had some plastic dog poo picking up bags that I wore on my hands. Real professional, I know!

I let the stripper sit for about 15-20 minutes. Here's what it looked like at this point:

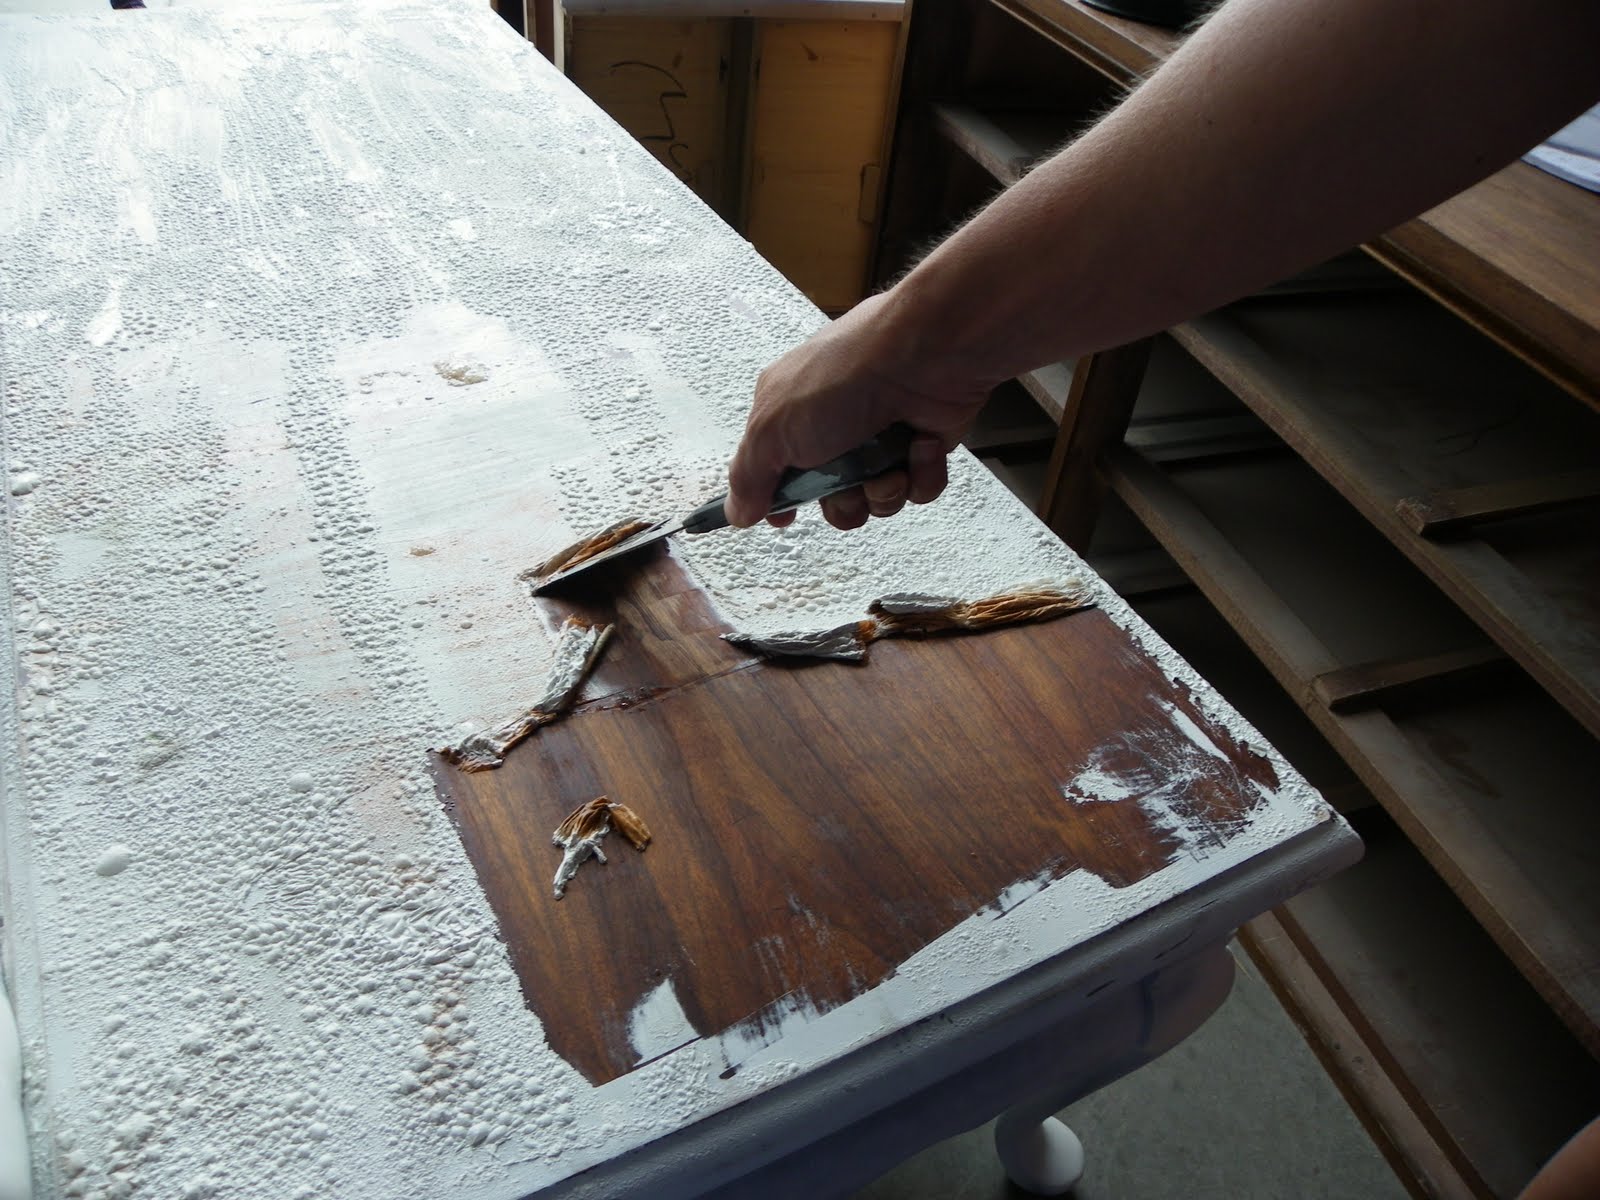
Next, I took a scraper and starting scraped the paint off. It came off very easily in most places:

It didn't come off everywhere, so I applied more stripper. Waited and then scraped those places:

I got most of the paint off and then took a rag and wiped down the remainder. There was still a tiny bit of paint in the cracks, but don't worry about that.

You are not supposed to use a metal scraper because you can scratch the wood.  Because I will be distressing this piece, I didn't care if the wood was scratched.

The next step is to wipe the whole thing down with your mineral spirits or paint thinner. I just poured some in my little cup, dipped an old t-shirt in and wiped the table.

Finally, I took another clean, wet rag and gave the piece a final cleaning. I sanded a few small places that still had flecks of paint.

Here's what she looks like after being stripped:

This process was much easier than I expected and took less than an hour start to finish. Don't be afraid, everyone should strip at least once!  Please be aware that this is just the easy-peasy way to strip that I came up with.  It might not be the exact perfect way to do it.  For a better, more professional tutorial, check out this tutorial I found from the Refinish Wizard.

Come back next time to see how I finished off this piece.

Linked:
Today's Creative Blog
Sugar Bee Crafts
Not Just a Housewife
Reasons to Skip the Housework
Bella Before and After
Home Stories of A to Z
Tip Junkie
Type A Decorating
The Thrifty Home
Thrifty 101